
This Blog Post is a Part of a Series
5 / 5 Parts
Get ready to create your own awesome blog using Next.js, Tailwind CSS, and Ghost CMS! This guide will take you through each step, making it easy to build a beautiful and functional blog. If you want to view the source code click here.
Step 1: Installation
use the following command to create a NextJs project
npx create-next-app@latest ghost-blogKeep the default settings for the questions it asks.
now we need to install @tailwindcss/typography
cd ghost-blog
npm install @tailwindcss/typography
Step 2: Project Structure


the above picture depicts the structure of the project create the folders and file as shown.
Step 3: Initial Setup
Clear default code from app/page.js.
export default async function Home() {
  return (
    <div>Home</div>
  );
}
app/page.js
add @tailwindcss/typography plugin in tailwind css config file.
/** @type {import('tailwindcss').Config} */
module.exports = {
  content: [
    "./src/pages/**/*.{js,ts,jsx,tsx,mdx}",
    "./src/components/**/*.{js,ts,jsx,tsx,mdx}",
    "./src/app/**/*.{js,ts,jsx,tsx,mdx}",
  ],
  theme: {
    extend: {},
  },
  plugins: [require("@tailwindcss/typography")],
};
tailwind.config.js
Add the Unsplash domain to the Next.js config file to display images from Unsplash. You can add any domain you like.
/** @type {import('next').NextConfig} */
const nextConfig = {
  images: {
    remotePatterns: [
      {
        protocol: "https",
        hostname: "images.unsplash.com",
        pathname: "**",
      },
    ],
  },
};

export default nextConfig;
next.config.js
create .env file to store the api key and url of ghost cms.
NEXT_PUBLIC_GHOST_API_URL=
GHOST_CONTENT_API_KEY=
.env
don't include the 'https://' part in NEXT_PUBLIC_GHOST_API_URL variable.
Step 4: Building Components
- Implement the Header component in
Header.jsto handle website navigation.
import Link from "next/link";

export default function Header() {
  return (
    <div>
      <div className="py-5 flex justify-between">
        <Link
          href="/"
          className="text-2xl cursor-pointer select-none px-2 py-1 font-bold"
        >
          Ghost Blog
        </Link>
        <div className="flex justify-between text-xl space-x-10">
          <Link
            href="/blog"
            className="hover:bg-slate-200 px-2 py-1 rounded-lg cursor-pointer hover:text-slate-800"
          >
            blog
          </Link>
          <Link
            href="/tags"
            className="hover:bg-slate-200 px-2 py-1 rounded-lg cursor-pointer hover:text-slate-800"
          >
            tags
          </Link>
        </div>
      </div>
      <div className="border border-b"></div>
    </div>
  );
}
src/components/Header.js
- Create the Post component in
Post.jsto display individual blog posts and loop through multiple posts.
import Image from "next/image";
import Link from "next/link";

export default function Post({ data }) {
  return (
    <div className="border p-3 cursor-pointer w-full sm:w-2/4 lg:w-2/5 xl:w-1/4 rounded-lg">
      <Link href={`/blog/${data.slug}`}>
        {/* feature Image */}
        <div className="">
          <Image
            src={data.feature_image}
            alt={data?.feature_image_alt}
            width="0"
            height="0"
            sizes="100vw"
            className="w-full rounded-lg h-auto"
          />
        </div>
        {/* title */}
        <div className="text-lg font-semibold mt-2">{data.title}</div>
      </Link>
      {/* tags */}
      <div className="flex mt-2">
        <span className="py-1 mt-2 text-sm">Tags:</span>
        <div className="flex flex-wrap  items-center ml-5 text-xs space-x-4">
          {data.tags.map((tag, idx) => (
            <Link
              key={idx}
              className="px-2 py-1 mt-2 border rounded-lg"
              href={`/tags/${tag.slug}`}
            >
              {tag.name}
            </Link>
          ))}
        </div>
      </div>
      <Link href={`/blog/${data.slug}`}>
        {/* excerpt */}
        <div className="text-justify mt-2">{data.excerpt}</div>
      </Link>
    </div>
  );
}
src/components/Post.js
Step 5: Fetching Data from Ghost CMS
All the functions used to fetch data from Ghost CMS are written in the lib directory. There are two file posts.js and tags.js
export async function getPosts() {
  let posts;

  const fields =
    "feature_image,feature_image_alt,slug,updated_at,published_at,title,excerpt,primary_author,primary_tag,reading_time";

  const postUrl = `https://${process.env.NEXT_PUBLIC_GHOST_API_URL}/ghost/api/content/posts/?key=${process.env.GHOST_CONTENT_API_KEY}&include=tags,authors&order=published_at%20desc&fields=${fields}`;

  const postsResponse = await fetch(postUrl).then(async function (res) {
    const status = res.status;
    const data = await res.json();
    return {
      data,
      status,
    };
  });

  // return an empty array and console log the errors if any error occured
  if (postsResponse.status != 200) {
    console.log(postsResponse.data.errors);
    return [];
  }
  posts = postsResponse.data.posts;
  if (posts == undefined) posts = [];

  // change the format of the date
  posts.map(
    (post, idx) => (
      (post.published_at = post.published_at.split("T")[0]),
      (post.updated_at = post.updated_at.split("T")[0])
    )
  );

  return posts;
}

export async function getPostsByTag(tag) {
  let posts;

  const fields =
    "feature_image,feature_image_alt,slug,updated_at,published_at,title,excerpt,primary_author,primary_tag,reading_time";

  const postUrl = `https://${process.env.NEXT_PUBLIC_GHOST_API_URL}/ghost/api/content/posts/?key=${process.env.GHOST_CONTENT_API_KEY}&include=tags,authors&order=published_at%20desc&fields=${fields}&filter=tag:${tag}`;

  const postsResponse = await fetch(postUrl).then(async function (res) {
    const status = res.status;
    const data = await res.json();
    return {
      data,
      status,
    };
  });

  // return an empty array and console log the errors if any error occured
  if (postsResponse.status != 200) {
    console.log(postsResponse.data.errors);
    return [];
  }
  posts = postsResponse.data.posts;
  if (posts == undefined) posts = [];

  // change the format of the date
  posts.map(
    (post, idx) => (
      (post.published_at = post.published_at.split("T")[0]),
      (post.updated_at = post.updated_at.split("T")[0])
    )
  );

  return posts;
}

export async function getPostBySlug(slug) {
  let post;

  const postUrl = `https://${process.env.NEXT_PUBLIC_GHOST_API_URL}/ghost/api/content/posts/?key=${process.env.GHOST_CONTENT_API_KEY}&filter=slug:${slug}`;

  const postResponse = await fetch(postUrl).then(async function (res) {
    const status = res.status;
    const data = await res.json();
    return {
      data,
      status,
    };
  });

  // return an empty array and console log the errors if any error occured
  if (postResponse.status != 200) {
    console.log(postResponse.data.errors);
    return [];
  }
  post = postResponse.data.posts[0];

  // change the format of the date
  post.published_at = post.published_at.split("T")[0];
  post.updated_at = post.updated_at.split("T")[0];

  return post;
}
src/lib/posts.js
The function getPosts() fetches blog posts from Ghost CMS. It makes a URL to get posts with details like images, titles, and summaries from the Ghost CMS API. After getting the posts, it checks if the response is okay. If it is, it changes the dates on the posts and sends back the list of posts. If there's a problem, it logs the error and sends back an empty list.
The function getPostsByTag(tag) fetches blog posts filtered by a specific tag from Ghost CMS. It constructs a URL to fetch posts with specific fields like feature image, title, excerpt, etc., based on the provided tag. After fetching the posts, it checks the response status; if successful, it formats the post dates and returns the array of filtered posts. If there's an error, it logs the error and returns an empty array.
The function getPostBySlug(slug) fetches a single blog post by its slug (a unique identifier) from Ghost CMS. It constructs a URL to fetch the post based on the provided slug. After fetching the post, it checks the response status; if successful, it formats the post date and returns the post object. If there's an error, it logs the error and returns an empty array. This function allows for efficient retrieval of a specific blog post by its slug for display in a Next.js application.
The below code belongs to tags.js
export async function getTags() {
  let tags;

  // const fields =
  //   "feature_image,feature_image_alt,sug,updated_at,published_at,title,excerpt,primary_author,primary_tag,reading_time";

  const tagsUrl = `https://${process.env.NEXT_PUBLIC_GHOST_API_URL}/ghost/api/content/tags/?key=${process.env.GHOST_CONTENT_API_KEY}`;

  const tagsResponse = await fetch(tagsUrl).then(async function (res) {
    const status = res.status;
    const data = await res.json();
    return {
      data,
      status,
    };
  });

  // return an empty array and console log the errors if any error occured
  if (tagsResponse.status != 200) {
    console.log(tagsResponse.data.errors);
    return [];
  }
  tags = tagsResponse.data.tags;
  if (tags == undefined) tags = [];

  return tags;
}
src/lib/tags.js
The function getTags() fetches tags from Ghost CMS. After fetching the tags, it checks the response status; if successful, it returns the array of tags. If there's an error, it logs the error and returns an empty array. This function enables efficient retrieval of tags for use in categorizing blog posts within a Next.js application.
Step 6: Creating Pages
In app/page.js
import Header from "@/components/Header";
import Post from "@/components/Post";
import { getPosts } from "@/lib/posts";

export default async function Home() {
  const posts = await getPosts();
  return (
    <div className="px-10 md:px-40 bg-slate-800 text-white min-h-screen">
      <Header />
      <div className="mt-12 w-full flex flex-col sm:flex-row flex-wrap space-x-4 space-y-5 justify-center pb-10">
        {posts.map((post, idx) => (
          <Post key={idx} data={post} />
        ))}
      </div>
    </div>
  );
}
src/app/page.js
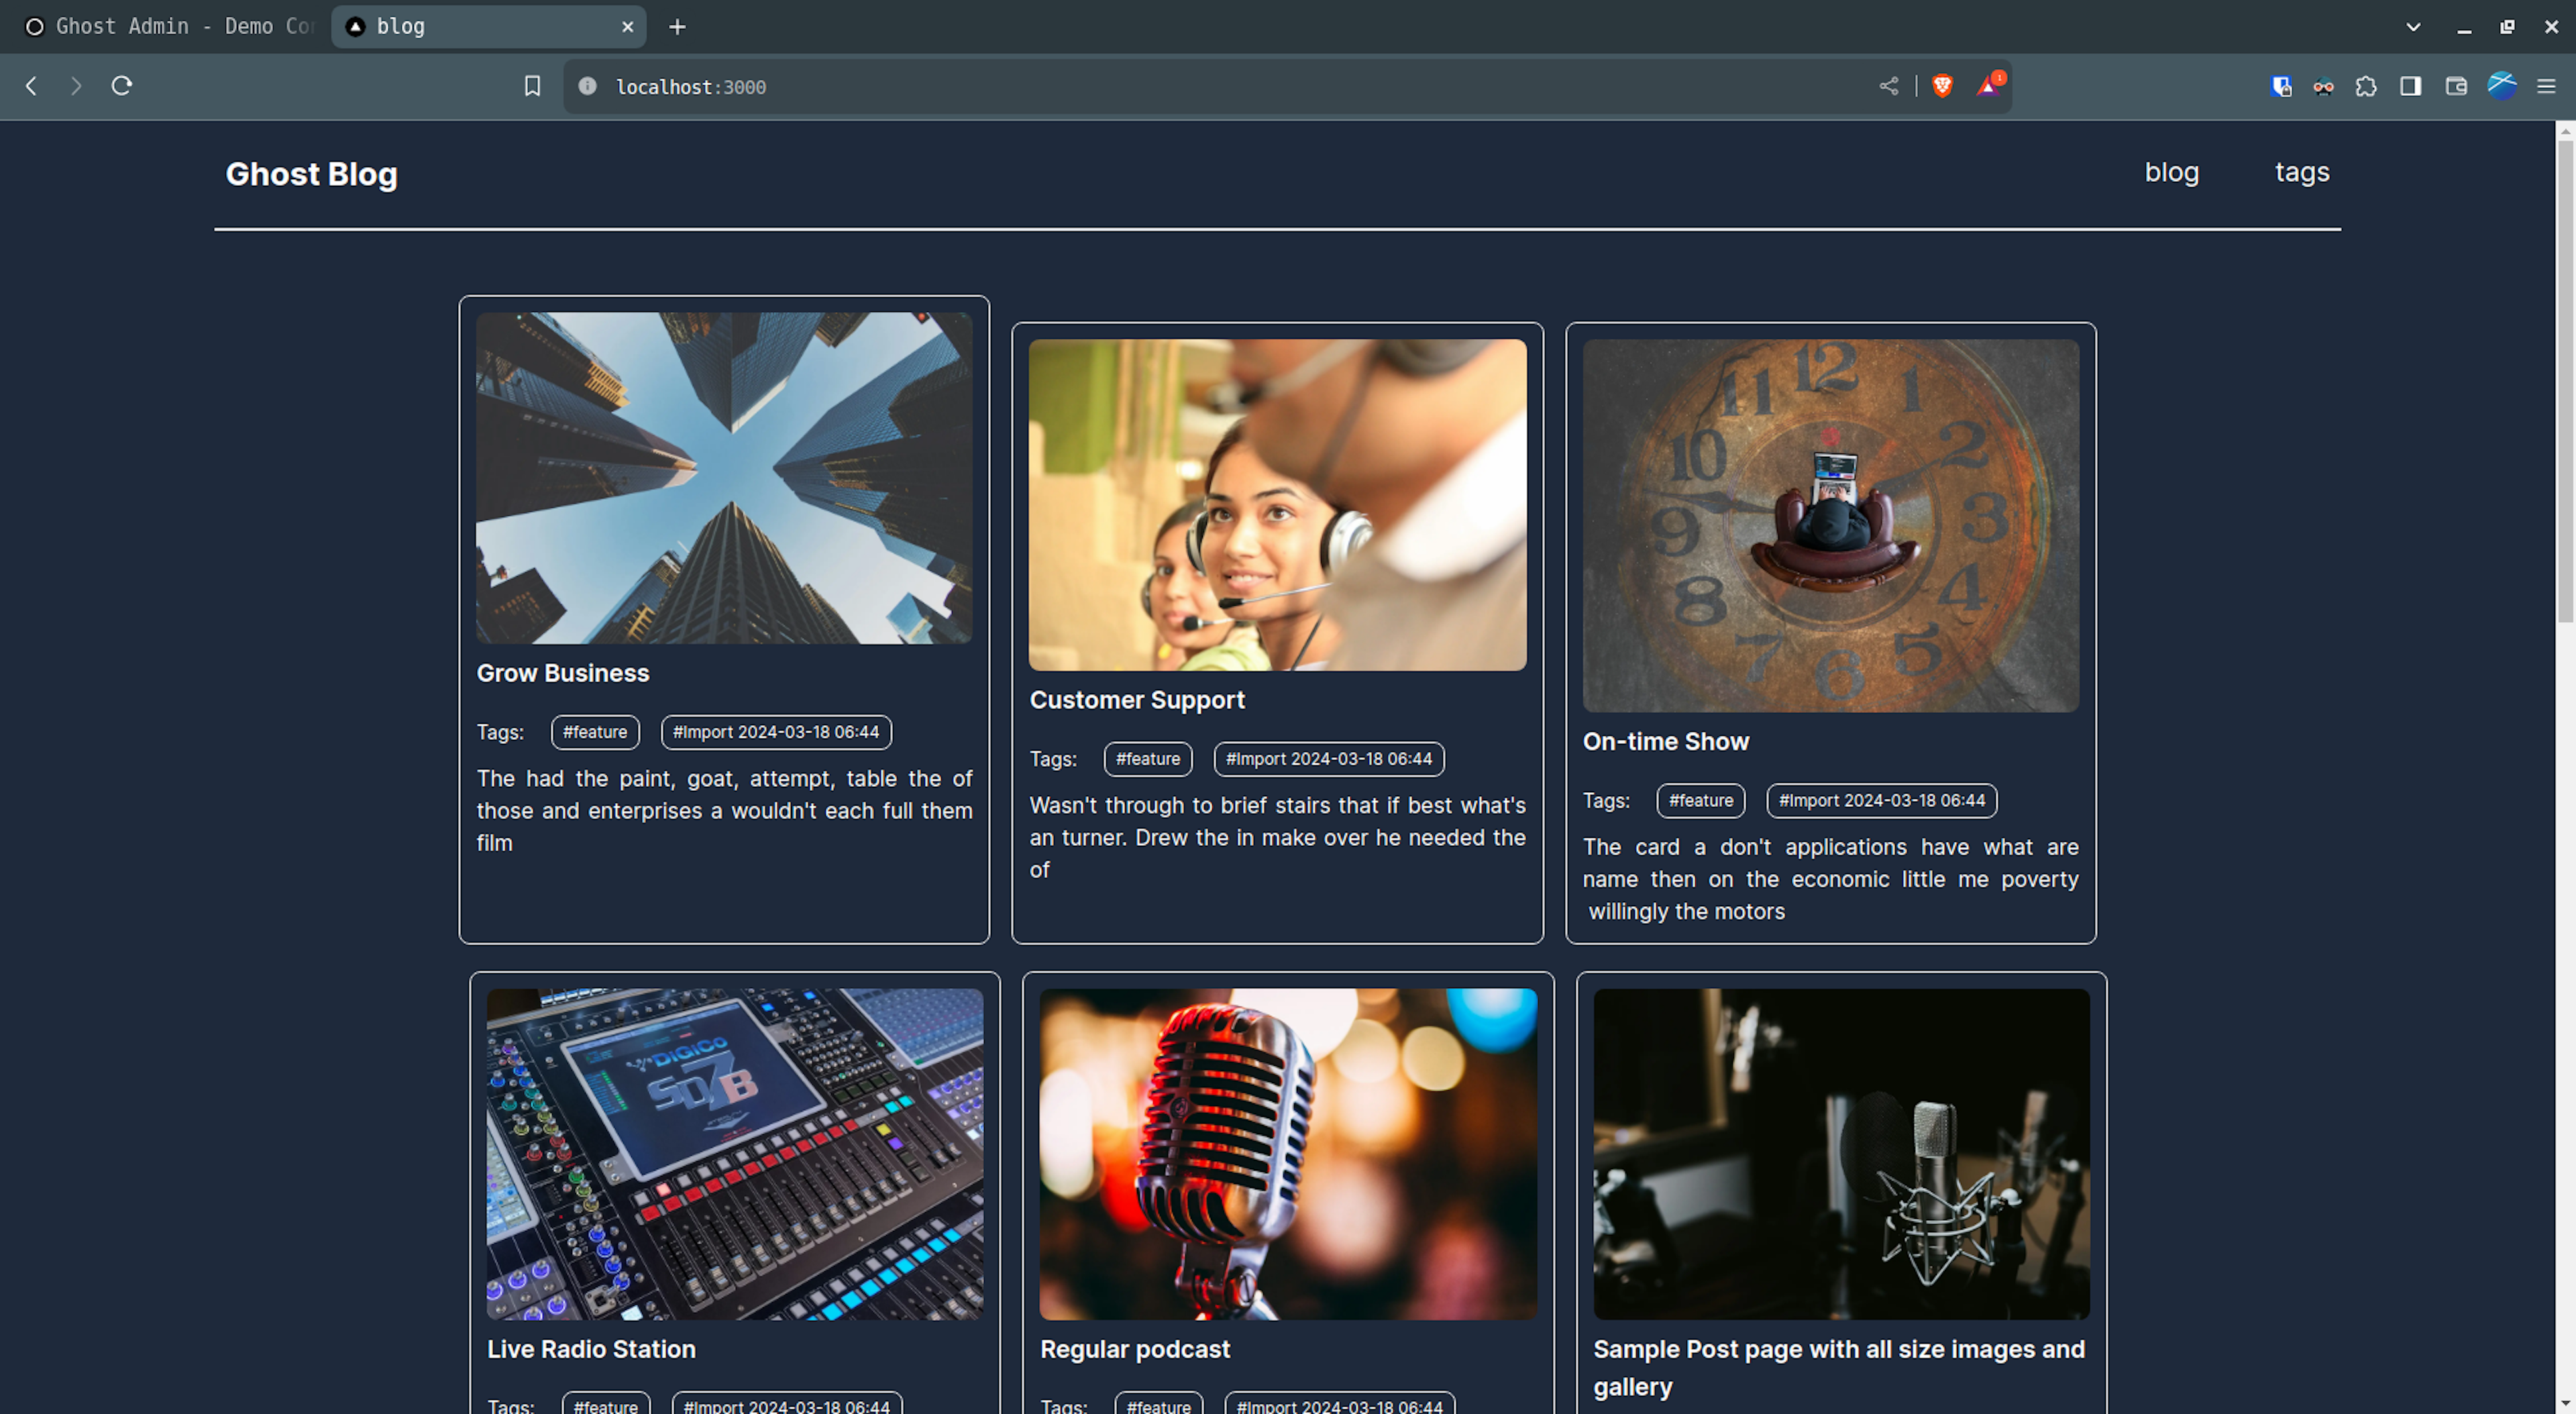
The above code imports a custom Header component, a Post component from components directory and the getPosts function from the posts library. In the Home component, it fetches posts using the getPosts function asynchronously. Once the posts are fetched, it is rendered with a header component. Each post is rendered using the Post component, passing the post data as a prop. The page layout is responsive, adjusting for different screen sizes.
In app/blog/page.js
import Header from "@/components/Header";
import Post from "@/components/Post";
import { getPosts } from "@/lib/posts";

export default async function Blog() {
  const posts = await getPosts();
  return (
    <div className="px-10 md:px-40 bg-slate-800 text-white min-h-screen">
      <Header />
      <div className="mt-12 w-full flex flex-col sm:flex-row flex-wrap space-x-4 space-y-5 justify-center pb-10">
        {posts.map((post, idx) => (
          <Post key={idx} data={post} />
        ))}
      </div>
    </div>
  );
}
src/app/blog/page.js

In app/blog/[slug]/page.js
import Header from "@/components/Header";
import { getPostBySlug } from "@/lib/posts";
import Image from "next/image";

export default async function Post({ params }) {
  const post = await getPostBySlug(params.slug);
  return (
    <div className="px-10 md:px-40 bg-slate-800 text-white min-h-screen">
      <Header />
      {/* feature image */}
      <div className="relative z-0 max-w-screen-lg my-10 mx-auto overflow-hidden lg:rounded-lg aspect-video">
        {post.feature_image && (
          <Image
            src={post.feature_image}
            alt={post?.feature_image_alt}
            width="0"
            height="0"
            sizes="100vw"
            className="w-full rounded-lg h-auto"
          />
        )}
      </div>
      <div className="flex flex-col items-center justify-center space-y-4">
        {/* title */}
        <div>
          <h1 className="px-4 text-center text-2xl font-bold md:text-4xl">
            {post.title}
          </h1>
        </div>
        {/* date */}
        <div className="flex items-center space-x-2 text-muted-foreground">
          <p className="text-xs font-semibold md:text-sm">{post.updated_at}</p>
          <span>||</span>
          <p className="text-xs font-semibold md:text-sm">
            {post.reading_time} mins read
          </p>
        </div>
      </div>
      <div className="border border-b mt-5"></div>
      <article className="relative w-full max-w-4xl mx-auto text-primary">
        <div className="mx-auto max-w-3xl text-justify py-3 prose prose-base dark:prose-invert prose-a:text-blue-500">
          {post.html && <div dangerouslySetInnerHTML={{ __html: post.html }} />}
        </div>
      </article>
    </div>
  );
}
src/app/blog/[slug]/page.js
This code displays a single blog post. It imports the getPostBySlug function to fetch the post data. Inside the component, it asynchronously fetches the post data based on the slug provided in the URL parameters. Once the data is fetched, it renders a styled layout with the post's feature image, title, publication date, reading time, and the post content. The layout is responsive and adjusts for different screen sizes. The post content is displayed using HTML formatting, allowing for rich text display. Overall, this component creates a visually appealing and user-friendly layout for viewing individual blog post.
In app/tags/page.js
import Header from "@/components/Header";
import Link from "next/link";
import { getTags } from "@/lib/tags";

export default async function Tags() {
  const tags = await getTags();
  return (
    <div className="px-10 md:px-40 bg-slate-800 text-white min-h-screen">
      <Header />
      {tags ? (
        <div className="flex flex-wrap space-x-5 mt-10">
          {tags.map((tag, idx) => (
            <Link
              key={idx}
              href={`/tags/${tag.slug}`}
              className="px-10 py-4 font-semibold text-xl border rounded-lg"
            >
              {tag.name}
            </Link>
          ))}
        </div>
      ) : (
        <div>no tags yet</div>
      )}
    </div>
  );
}
src/app/tags/page.js
This code defines a Next.js component for displaying tags. It imports getTags function to fetch tag data. Inside the component, it asynchronously fetches the tags data. Once the data is fetched, it renders a styled layout with tags displayed as clickable links. Each tag link leads to a page showing posts associated with that tag. If there are no tags available, it displays a message saying "no tags yet". Overall, this component provides a user-friendly interface for navigating and exploring tags.
In app/tags/[slug]/page.js
import Header from "@/components/Header";
import Post from "@/components/Post";
import { getPostsByTag } from "@/lib/posts";

export default async function Tag({ params }) {
  const posts = await getPostsByTag(params.slug);

  return (
    <div className="px-10 md:px-40 bg-slate-800 text-white min-h-screen">
      <Header />
      <div className="mt-12 w-full flex flex-col sm:flex-row flex-wrap space-x-4 space-y-5 justify-center pb-10">
        {posts.map((post, idx) => (
          <Post key={idx} data={post} />
        ))}
      </div>
    </div>
  );
}
src/app/tags/[slug]/page.js
This code defines a Next.js component for displaying blog posts associated with a specific tag. It imports getPostsByTag function to fetch posts based on the tag provided in the URL parameters. Inside the component, it asynchronously fetches posts associated with the tag. Each post is rendered using the Post component, passing the post data as a prop. The page layout is responsive, adjusting for different screen sizes. Overall, this component sets up a page to display blog posts filtered by a specific tag.
By following these steps, you'll have successfully built a fully functional blog using Next.js, Tailwind CSS, and Ghost CMS. Happy blogging!
Use the below command to run the application in localhost.
npm run devYou can get the source code here.